> ## Documentation Index
> Fetch the complete documentation index at: https://www.bolna.ai/docs/llms.txt
> Use this file to discover all available pages before exploring further.
# Using the Workflow Editor
> A guided tour of the workflow editor: the canvas, toolbar, node catalog, validation, version history and import, for building workflows visually instead of through the API.
The workflow editor is the visual builder for creating and editing workflows in the Bolna dashboard. Everything it produces is the same [draft, version and publish](/docs/guides/workflows/introduction#the-object-model) model the API uses underneath — the canvas is just another way to edit the same definition.
***
## Opening the editor
Navigate to **Workflows** in the dashboard. Existing workflows are listed as cards showing their id, current status, and either their live version or **Draft — never published**.
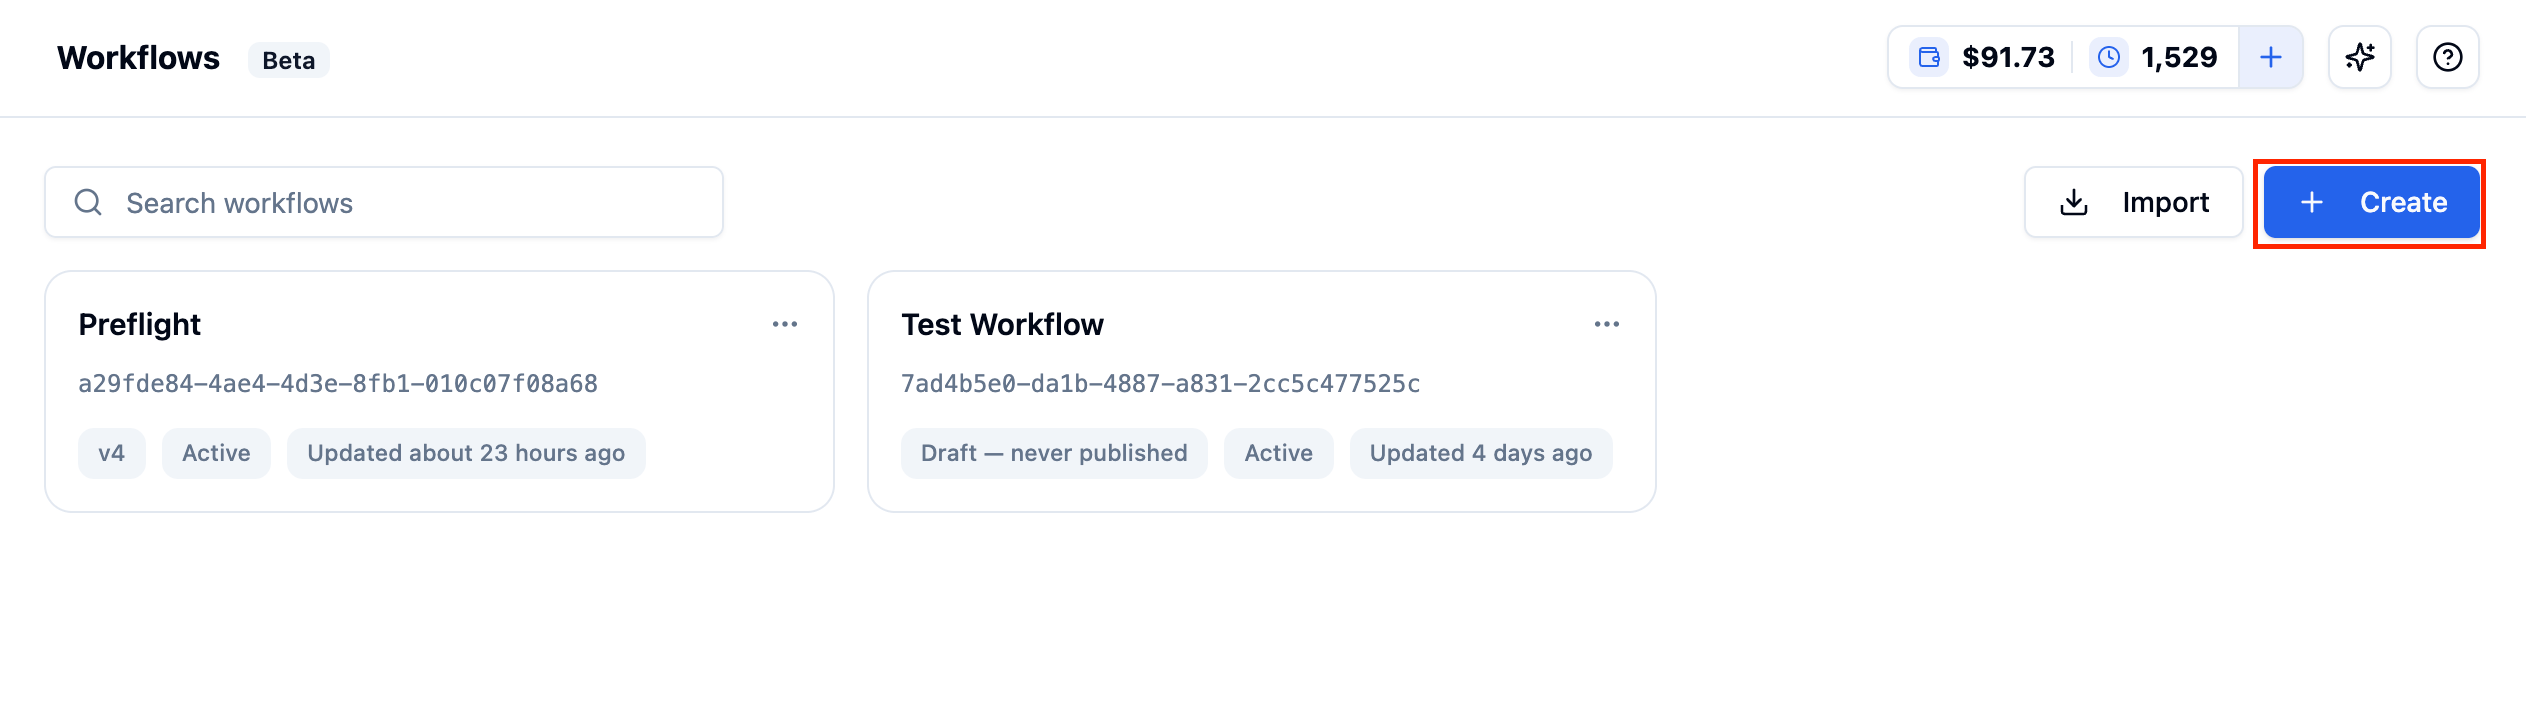 * Click **Create** to start a blank workflow. It opens directly in the editor with a single `Start` node already on the canvas.
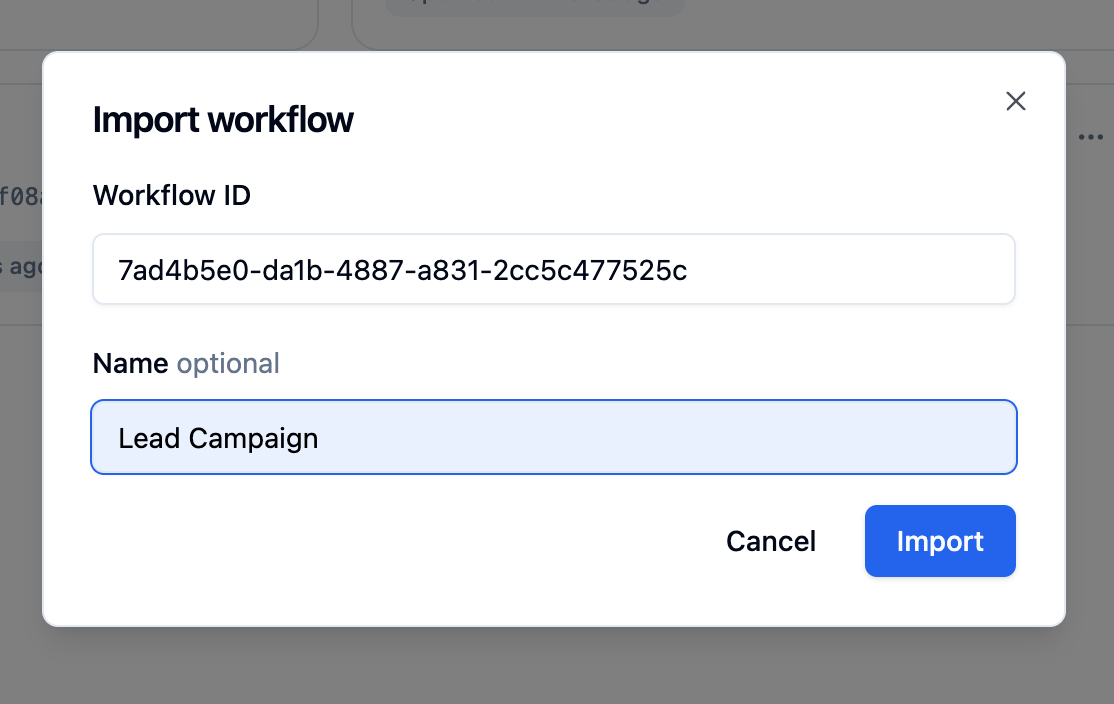
* Click **Import** to clone an existing workflow by its id — paste the source workflow's id and optionally rename the copy.
* Click **Create** to start a blank workflow. It opens directly in the editor with a single `Start` node already on the canvas.
* Click **Import** to clone an existing workflow by its id — paste the source workflow's id and optionally rename the copy.
 ***
## Editor layout
***
## Editor layout
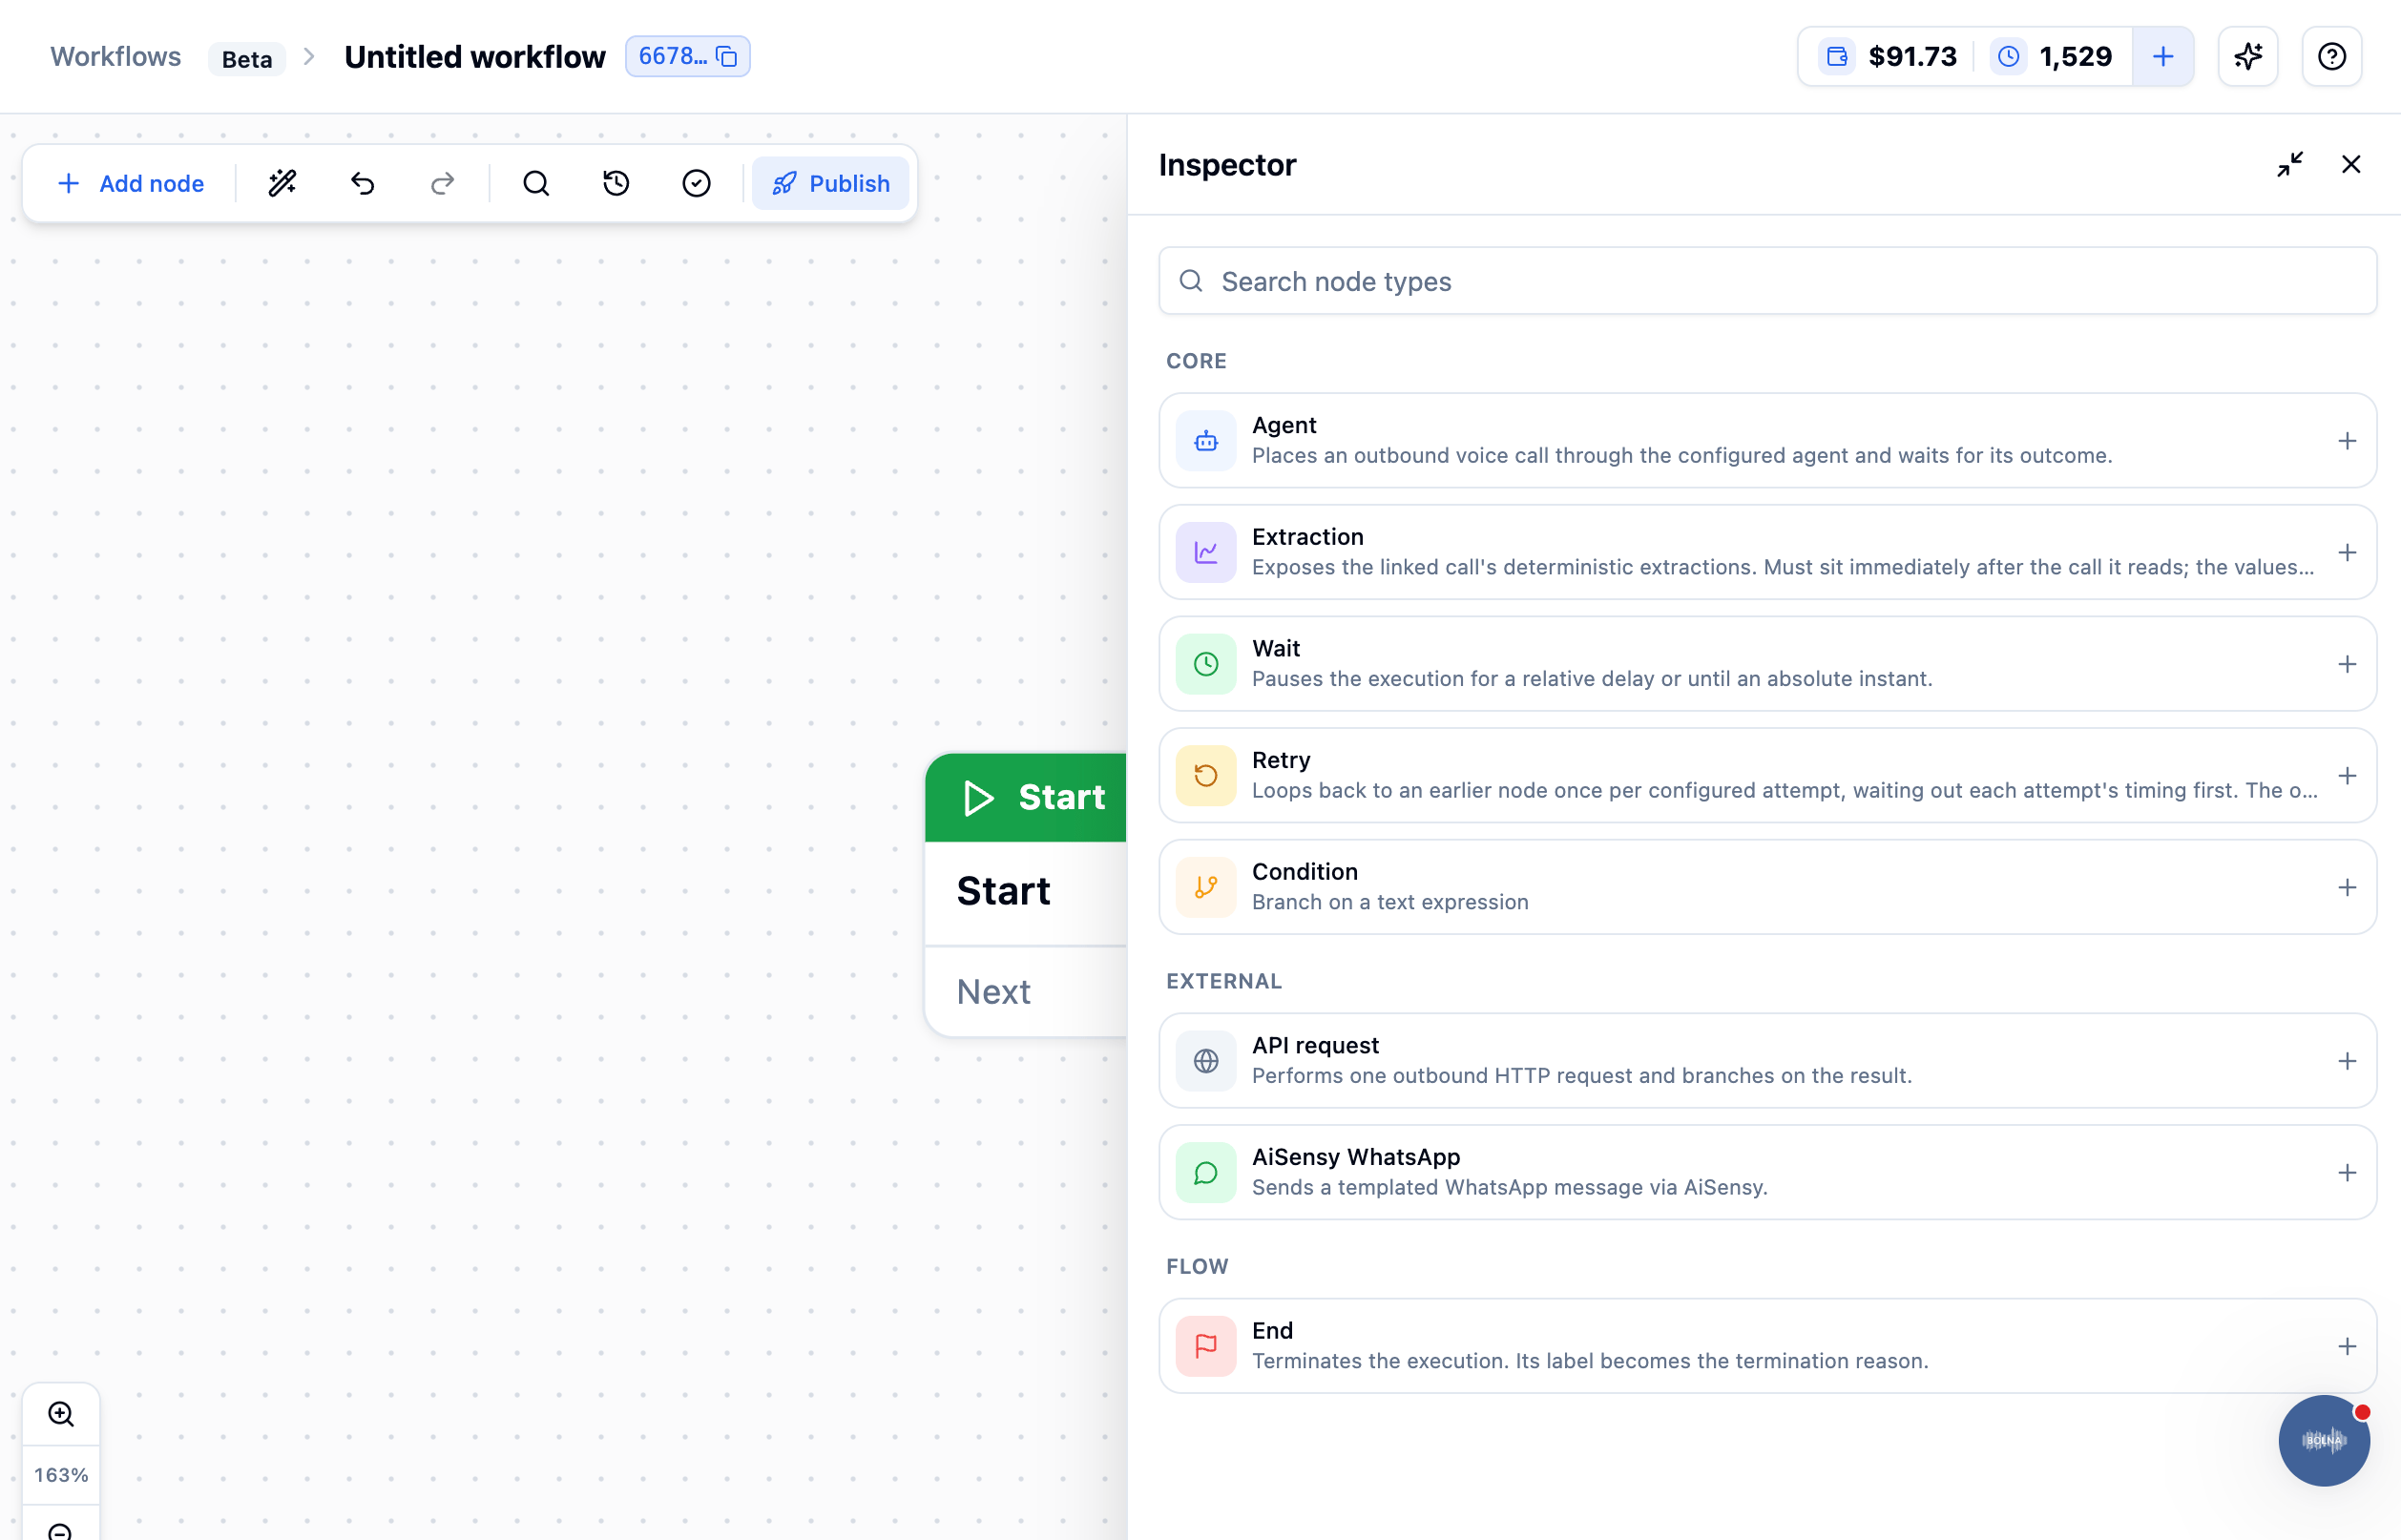 Like the [graph agent editor](/docs/graph-agent/using-the-editor), the workflow editor has a **canvas** in the centre and an **Inspector** panel on the right that opens for adding nodes, editing a selected node's config, or the panels described below. The workflow's id sits in the breadcrumb at the top, with a copy button next to it.
### Toolbar
Like the [graph agent editor](/docs/graph-agent/using-the-editor), the workflow editor has a **canvas** in the centre and an **Inspector** panel on the right that opens for adding nodes, editing a selected node's config, or the panels described below. The workflow's id sits in the breadcrumb at the top, with a copy button next to it.
### Toolbar
 | Button | Action |
| ------------------------- | --------------------------------------------------------------------------------------------------------------------------------------- |
| **Add node** | Opens the Inspector with the searchable node type catalog |
| Auto-arrange (wand icon) | Cleanly re-lays out every node on the canvas |
| Undo / redo | Steps back and forward through canvas edits |
| Search (magnifying glass) | Searches the *nodes already on this canvas* by name or type — see [Finding a node](#finding-a-node-on-a-crowded-canvas) |
| History (clock icon) | Opens [Version history](#version-history) |
| Validate (checkmark) | Runs the same checks as the [Validate API](/docs/api-reference/workflows/validate) against the current draft — see [Validating](#validating) |
| **Publish** | Freezes the draft as a new version, the same as the [Publish API](/docs/api-reference/workflows/publish) |
***
## Adding a node
Click **Add node** to open the catalog in the Inspector. Nodes are grouped the same way as the node reference:
| Button | Action |
| ------------------------- | --------------------------------------------------------------------------------------------------------------------------------------- |
| **Add node** | Opens the Inspector with the searchable node type catalog |
| Auto-arrange (wand icon) | Cleanly re-lays out every node on the canvas |
| Undo / redo | Steps back and forward through canvas edits |
| Search (magnifying glass) | Searches the *nodes already on this canvas* by name or type — see [Finding a node](#finding-a-node-on-a-crowded-canvas) |
| History (clock icon) | Opens [Version history](#version-history) |
| Validate (checkmark) | Runs the same checks as the [Validate API](/docs/api-reference/workflows/validate) against the current draft — see [Validating](#validating) |
| **Publish** | Freezes the draft as a new version, the same as the [Publish API](/docs/api-reference/workflows/publish) |
***
## Adding a node
Click **Add node** to open the catalog in the Inspector. Nodes are grouped the same way as the node reference:
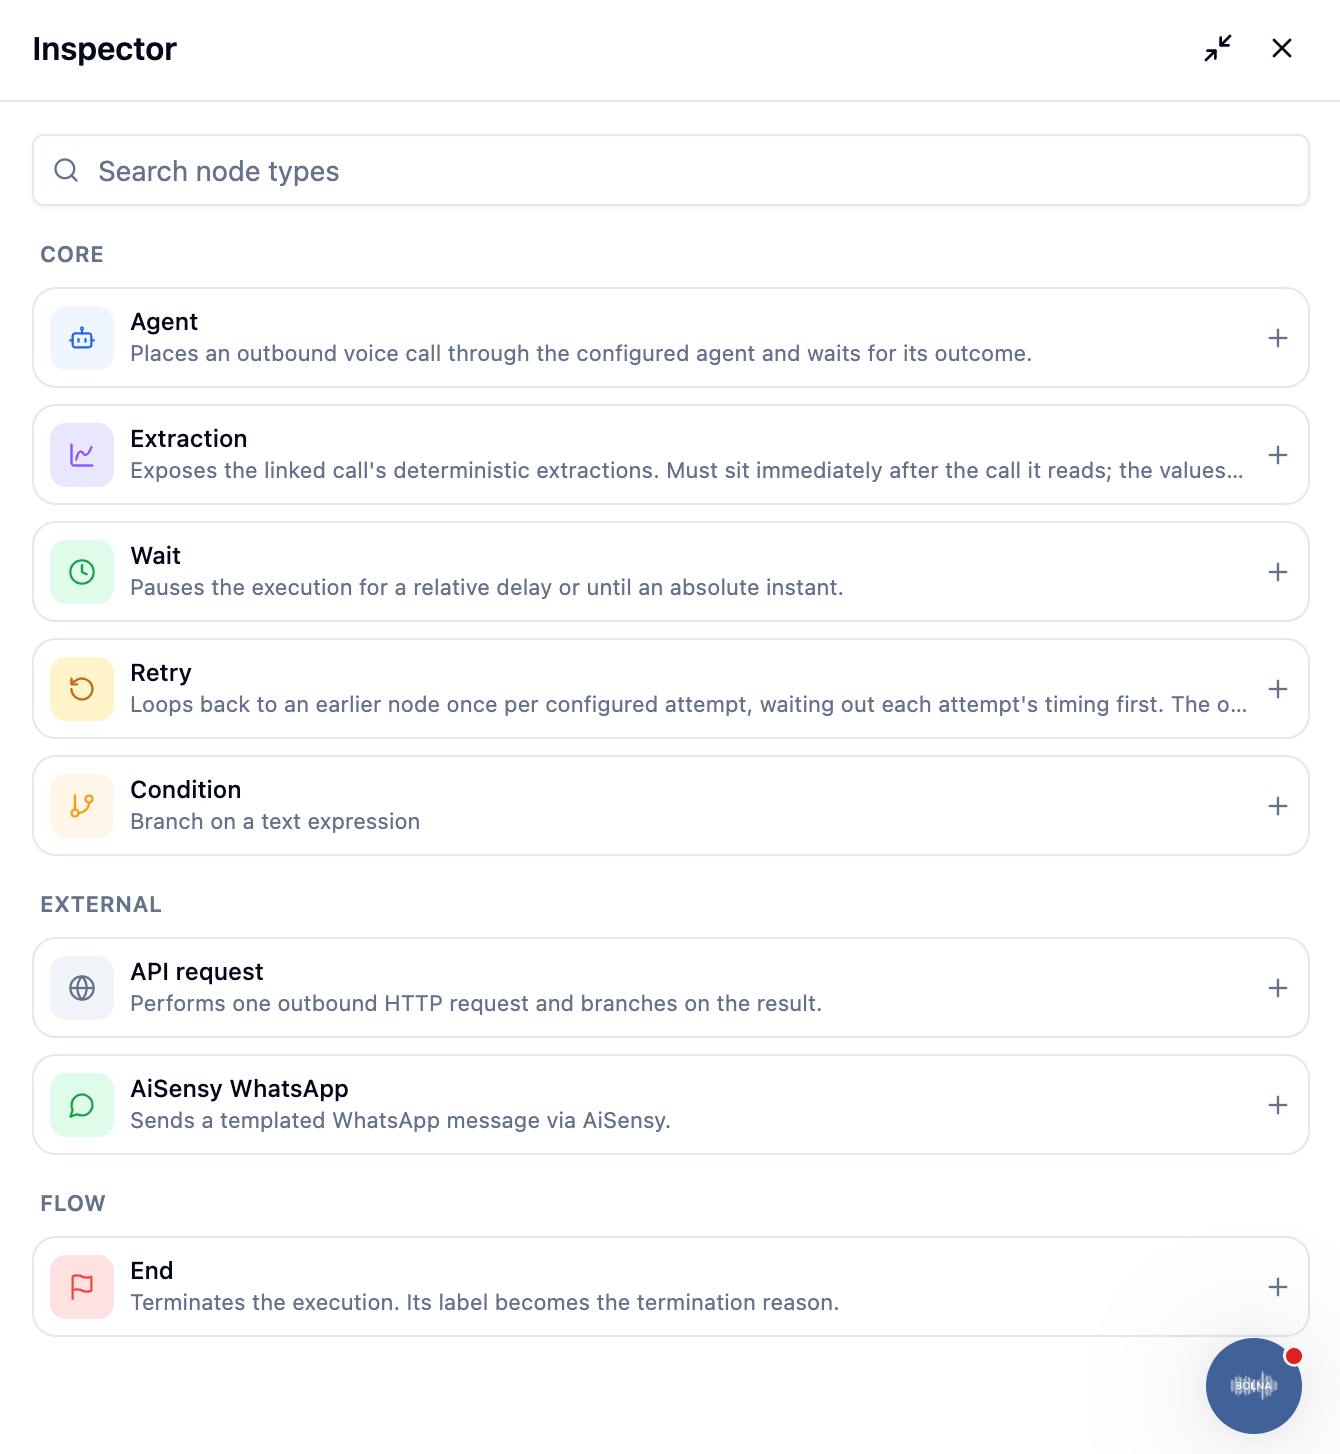 | Group | Node types |
| -------- | ----------------------------------------- |
| Core | Agent, Extraction, Wait, Retry, Condition |
| External | API request, AiSensy WhatsApp |
| Flow | End |
Click a node type's **+** to drop it on the canvas, then connect it and open it to configure its fields — the same fields documented per type in [Workflow Nodes](/docs/guides/workflows/nodes). `Wait` here is the `time` node type in the API, and `Condition` is a branching-only node for evaluating an expression without any side effect, alongside the `cases` every other node type already carries.
### Adding a node from an existing one
Hovering a node on the canvas (or opening it in the Inspector) shows a small toolbar with three icons — duplicate, **+**, and delete:
| Group | Node types |
| -------- | ----------------------------------------- |
| Core | Agent, Extraction, Wait, Retry, Condition |
| External | API request, AiSensy WhatsApp |
| Flow | End |
Click a node type's **+** to drop it on the canvas, then connect it and open it to configure its fields — the same fields documented per type in [Workflow Nodes](/docs/guides/workflows/nodes). `Wait` here is the `time` node type in the API, and `Condition` is a branching-only node for evaluating an expression without any side effect, alongside the `cases` every other node type already carries.
### Adding a node from an existing one
Hovering a node on the canvas (or opening it in the Inspector) shows a small toolbar with three icons — duplicate, **+**, and delete:
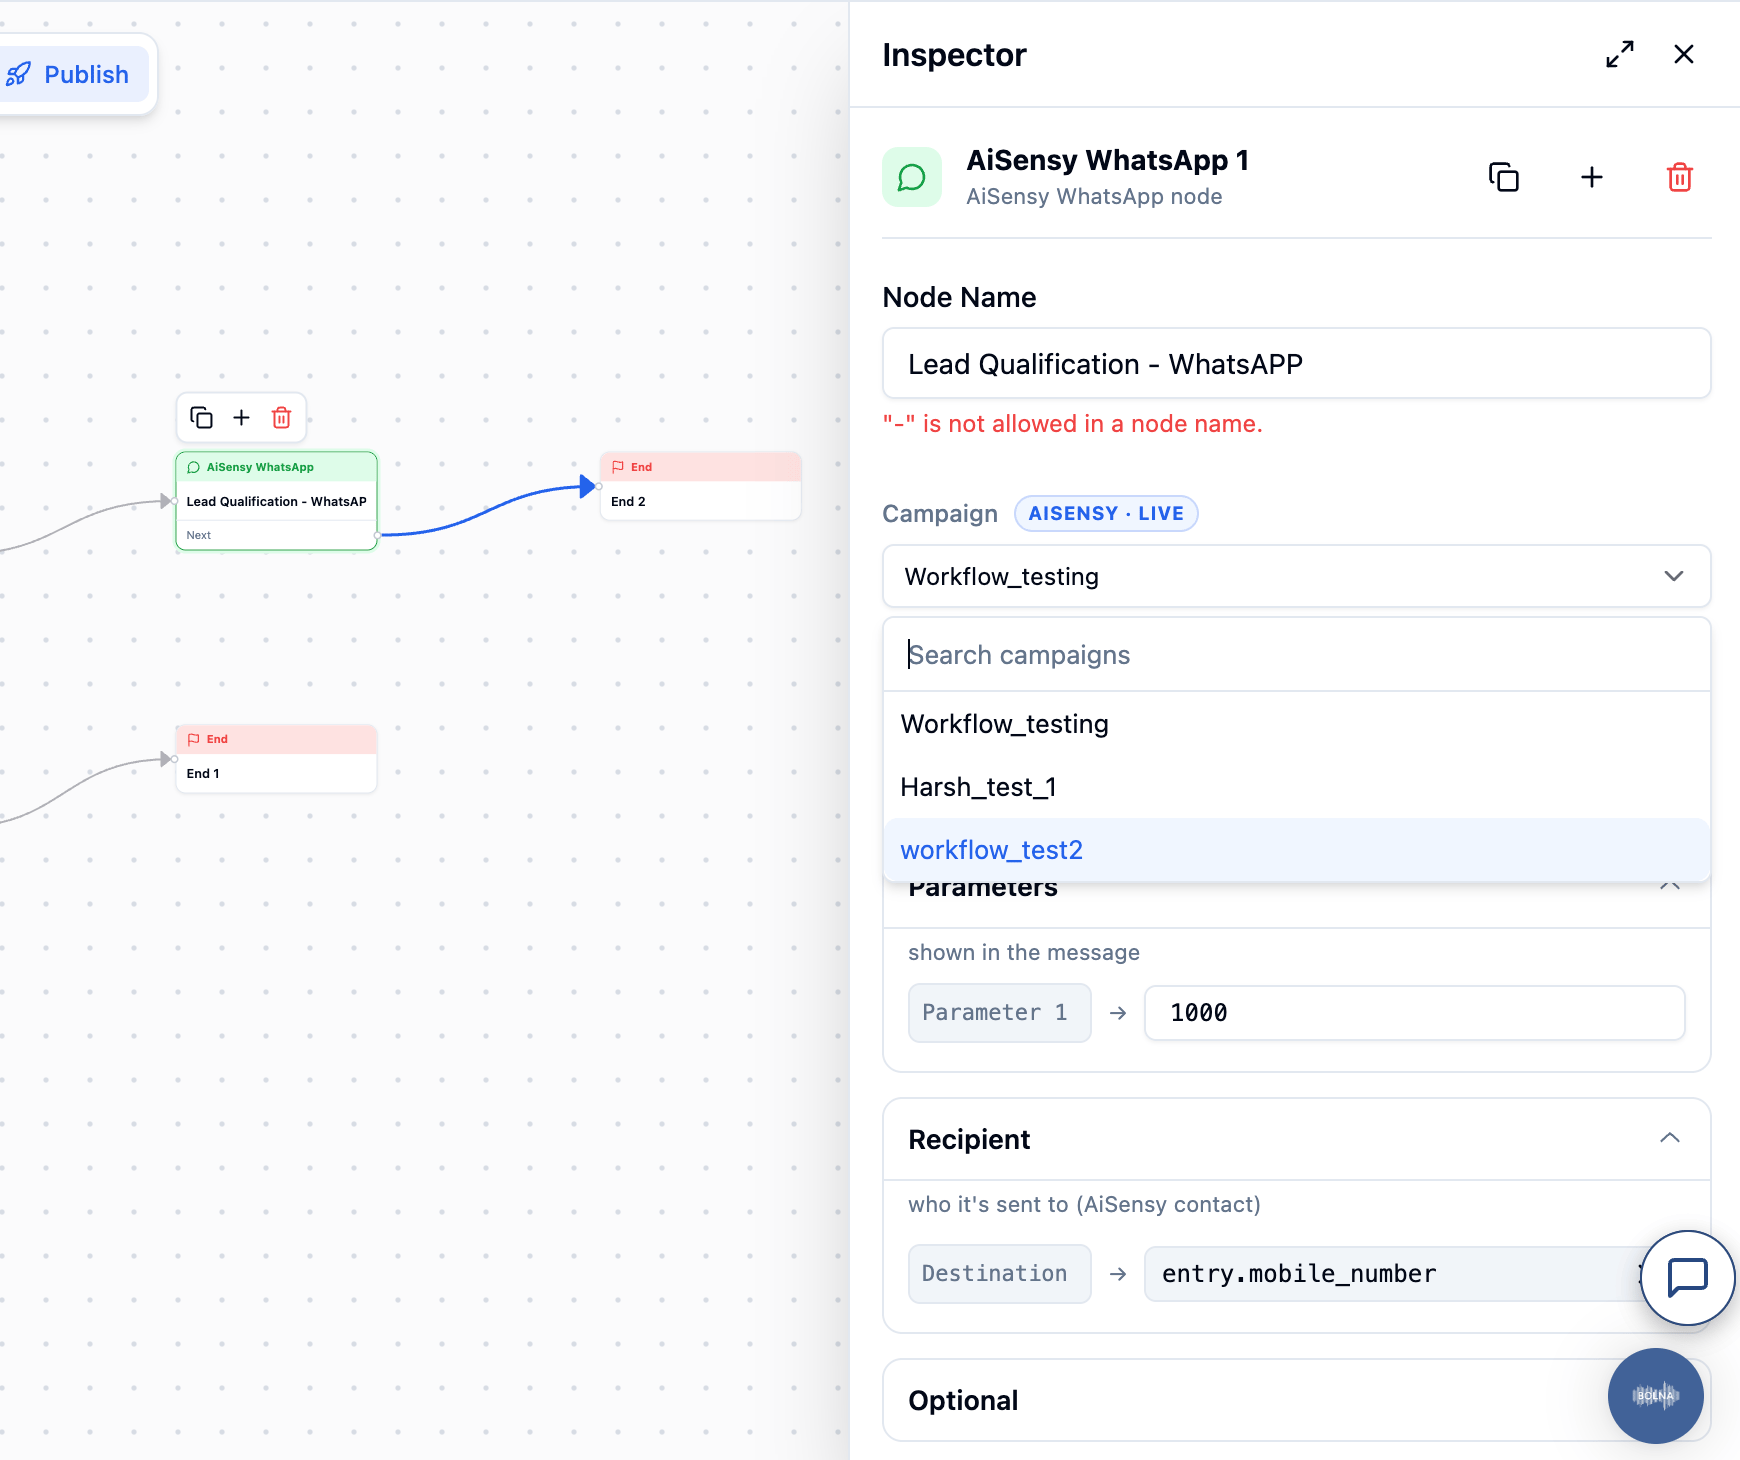 Clicking **+** here skips the catalog: it drops a new node already connected to that one, so you don't have to add a node from the catalog and then draw the connection yourself. This is the faster path once a graph has a few nodes in it — reach for the catalog ([above](#adding-a-node)) when you need a specific node type or the next node isn't adjacent to an existing one.
### Finding a node on a crowded canvas
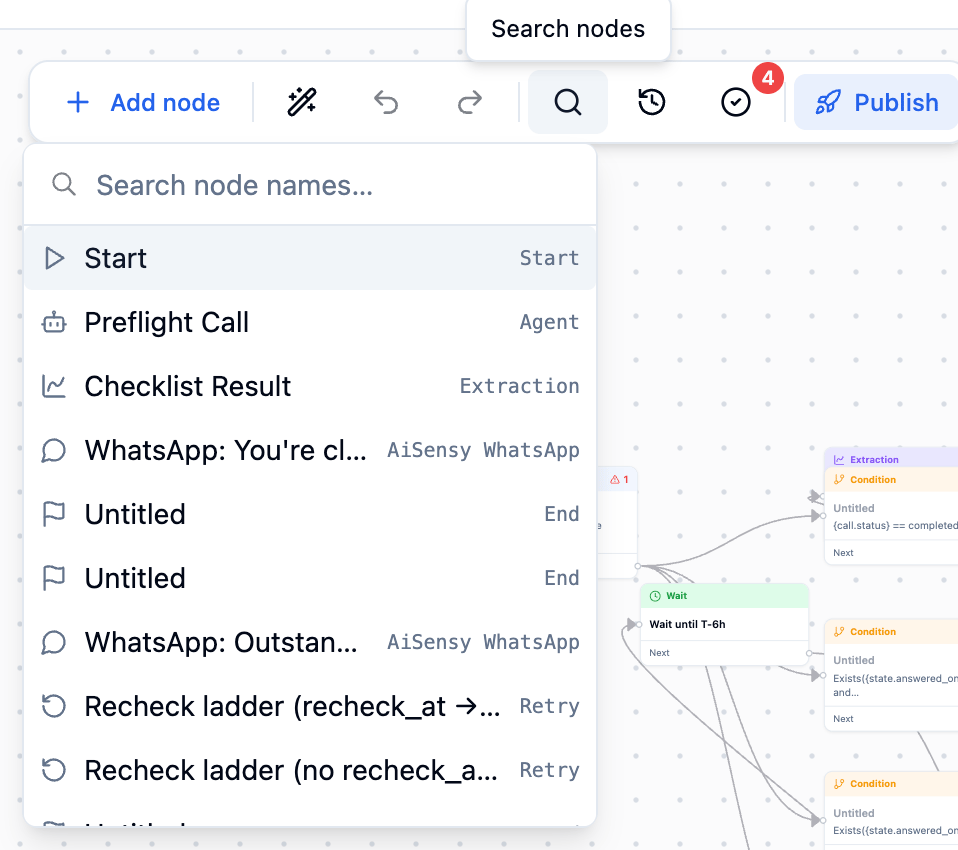
Once a workflow has many nodes, use the search (magnifying glass) button to jump to one by name or type, rather than scrolling and panning:
Clicking **+** here skips the catalog: it drops a new node already connected to that one, so you don't have to add a node from the catalog and then draw the connection yourself. This is the faster path once a graph has a few nodes in it — reach for the catalog ([above](#adding-a-node)) when you need a specific node type or the next node isn't adjacent to an existing one.
### Finding a node on a crowded canvas
Once a workflow has many nodes, use the search (magnifying glass) button to jump to one by name or type, rather than scrolling and panning:
 ***
## Validating
Click the checkmark button to validate the current draft without publishing it. A badge on the button shows the number of unresolved issues, matching the `severity: "error"` count the [Validate API](/docs/api-reference/workflows/validate) would return.
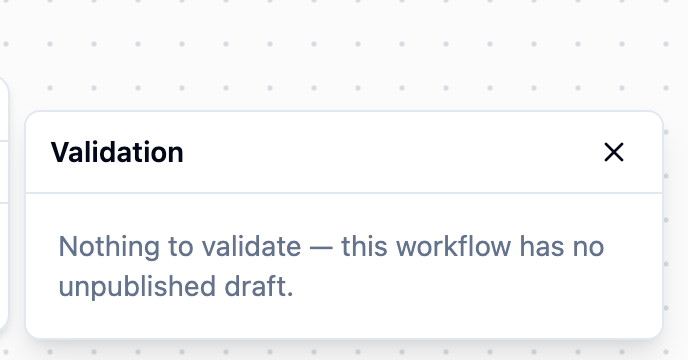
If there's no unpublished draft to check — for example, right after a fresh publish — validating says so instead of returning an empty issue list:
***
## Validating
Click the checkmark button to validate the current draft without publishing it. A badge on the button shows the number of unresolved issues, matching the `severity: "error"` count the [Validate API](/docs/api-reference/workflows/validate) would return.
If there's no unpublished draft to check — for example, right after a fresh publish — validating says so instead of returning an empty issue list:
 ***
## Version history
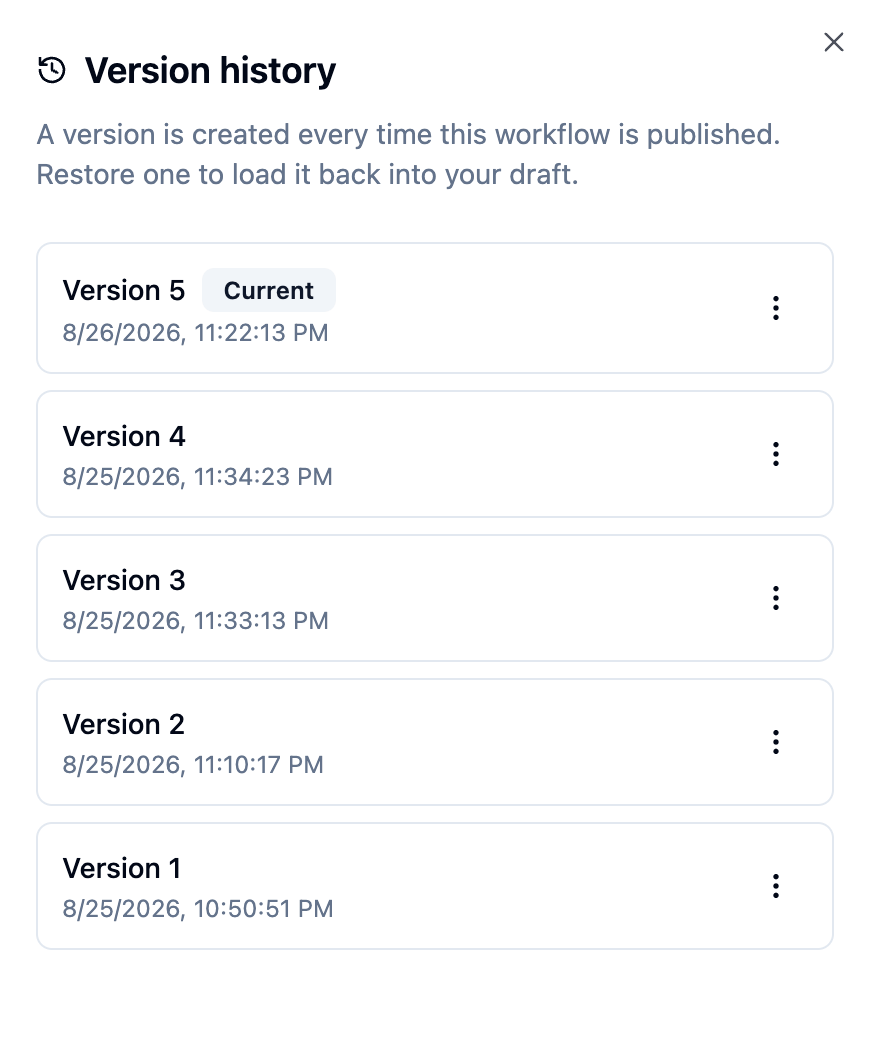
Every publish creates a version, exactly like the [Publish API](/docs/api-reference/workflows/publish). Open **History** to see them all, newest first, with the live one marked **Current**:
***
## Version history
Every publish creates a version, exactly like the [Publish API](/docs/api-reference/workflows/publish). Open **History** to see them all, newest first, with the live one marked **Current**:
 Each version's menu lets you inspect or act on it without leaving the list:
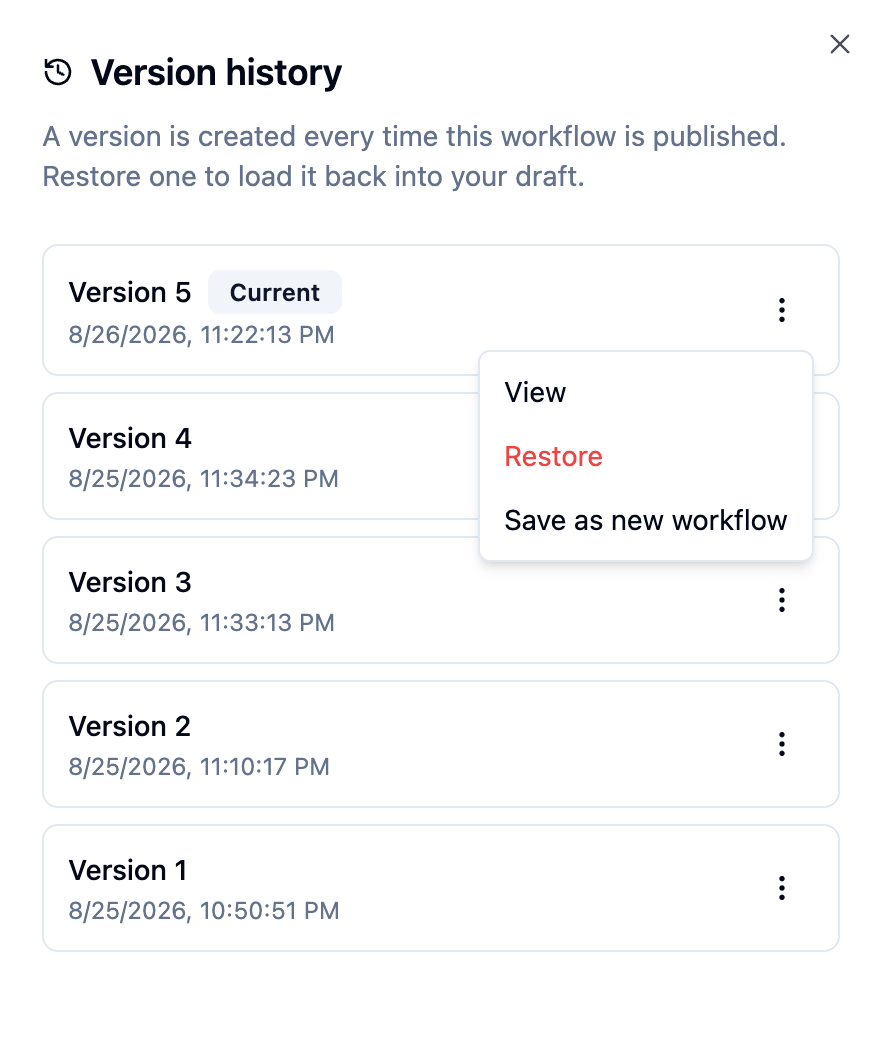 * **View** — opens that version's definition read-only.
* **Restore** — loads it back into the current draft for further editing. This doesn't publish anything by itself; you still validate and publish the restored draft like any other edit.
* **Save as new workflow** — copies that version into a brand-new workflow, leaving this one untouched.
***
## Next Steps
Every node type's configuration, in detail
Build the same workflow from the dashboard and the API, side by side
* **View** — opens that version's definition read-only.
* **Restore** — loads it back into the current draft for further editing. This doesn't publish anything by itself; you still validate and publish the restored draft like any other edit.
* **Save as new workflow** — copies that version into a brand-new workflow, leaving this one untouched.
***
## Next Steps
Every node type's configuration, in detail
Build the same workflow from the dashboard and the API, side by side